Purchasing your sliding barn door hardware - a few things to consider

The sliding barn door has become and architectural element that brings interest in your home space and since we design the hardware to be as DIY as possible, it should be a piece of cake installing it yourself - we provide detail instruction to make it as easy as possible for you to install. Right. There are a few things to consider when purchasing a sliding barn door hardware kit:

  1. There is an existing door that you are planning to use - Let it be a left over interior door or a sentimental, interesting barn door that will accentuate the look of your space - it should be at least 2" wider than your door opening. We recommend that overlap for privacy reasons.
  2. If you don't have a door yet and would like us to fabricate one for you - we offer various style of barn doors and you can choose to have it fabricated using new wood and stain to the colour of your liking, or using reclaimed barn boards at very affordable price. (Starting at $220). Please see below for door styles, and if you don't see one that suits you, please let us know and we will work with you to build one to your exact specification. Barn door style
  3. There is door trim at the door opening - It is recommended that your door should be 1/2"-1" higher than the door opening + door trim.
  4. There are baseboard & quarter round - How thick are they?  Please let us know when ordering so that we can accommodate the thickness.

We always clarify all these details with you when you inquire but we thought that it would be informational to have it here.

Our Muskoka barn door adventure!

barn_door_installed.jpg

On a sun-filled Sunday in March, we got up early and packed three barn doors and the two barn door hardware on top of the SUV to leave for Muskoka for an install in a handmade log cabin.  The minute we arrived, we couldn't believe the beauty before us!  Can you believe all the logs were de-barked by hand?  It took a year to do that! Small cabin and big cabin

logcabin

Front door with log details

See, I told you it's gorgeous.

This log cabin has a little cabin looking down on it from the top of a granite hill.  It almost seem as though they look out for one another and that gave me a warmth that is almost as good as the warmth of that sun hitting the logs. What a cool idea!

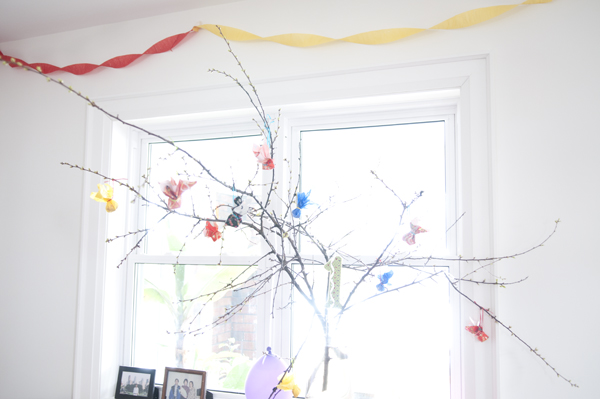
Now inside, it was hard to get to work right away.  We were so in awe that we had to walk around and take in as much as possible and...breath before we can do anything.  There is something about being in a space that is made purely of wood.  Moreover, this place had a lot of heart to it, and I really felt it, the little decorations, the hand scraped marks on the logs...no wonder this cabin didn't need any heating system...the small fire place was all there was that actually radiated physical heat.

DSC_8763

barn_door_installed

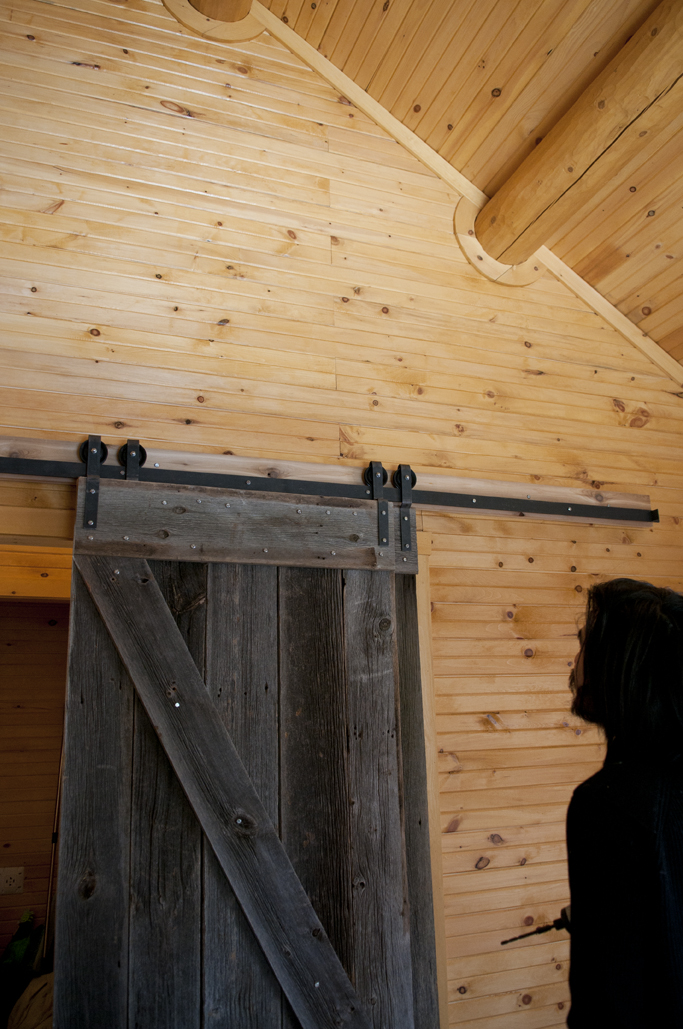
Our first installation was a single sliding door leading to a bedroom, as you can see from the above photo.

barndoor1 Rock stood proudly beside his install.

Our second installation was of a by-pass hardware system with two barn doors on one track.  This is to cover two openings that are side by side, one for a bathroom and one for the master bedroom.

.Sliding barn door hardware bypass hanging doors

Sliding barn door hardware bypass close

Sliding barn door hardware bypass open
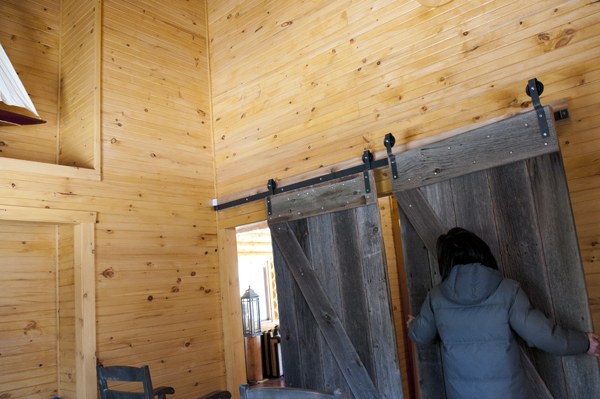
Rock admiring his by-pass install.

We were sad to leave the two cabins as the sun was just about to set. But before we left, our host took us to the little cabin up the hill where I saw the sun peaking out from behind to whisper that it expects us back for a visit.

That won't be a problem!

birdcage1

DSC_8790This rock on top of the hill is where a snake was found in the past summer.

DSC_8793On top over looking the big cabin.

DSC_8792

I saw this ladder on the hill and owner said he found it right where he was about to build the little cabin.  How sneakily symbolic of that ladder to have made itself be found there.


Sliding barn door hardware bypass style installation

Sliding-barn-door-hardware-bypass-open.jpg

As I've mentioned in a previous post, Hanging two doors | By-pass style, where we can make modification to The Heavy Metal flat track hardware to accommodate double doors in a bypass style configuration, this post will feature the actual installation. We were commissioned to fabricate 3 doors out of barn board and install them in a beautiful log cottage up in Muskoka. I hope I have an opportunity to come back in the future.

Let's get to business. Below is the initial planning before installation begins:

Sliding barn door hardware bypass initial planning

You can already appreciate the beauty of the log cabin and the great contrast the barn board doors have on the wall. We needed to protect the floor, which is reclaimed wood from the Ottawa river, so we rested the doors on a few coffee bean bags.

Mounting the track was really straight forward, no stud finder was needed as we were able to spot the nails securing the tongues and groves on the studs.

Here is mounting the doors:

Sliding barn door hardware bypass hanging doors


and this is how it looks when completed

Sliding barn door hardware bypass close


We intentionally took this picture that shows a sail boat - this is one of fully functional sail boats that the client collects from all over the world as his hobby. He as about 30 of them.

And finally, this how the doors look when they are fully opened:

Sliding barn door hardware bypass open


Please feel free to contact us and discuss with us if you want a similar set up.


Cherry blossoms in your home NOW!

DSC_8673

DSC_8673

We just had a party at our house, and I wanted something festive and fresh for the house, and also make it fun.  My mom has a cherry tree that I begged for some branches (it's her beloved tree). To make it fun and festive, I wrapped candy in Japanese paper, and I wrote silly fortunes inside the paper like “you'll never grow old,” or “you'll be married in two years,” or “you'll move to another country 10 years from now.”  I hang these candy fortunes up so that the guests can pick them.

DSC_8684

DSC_8684

DSC_8681

DSC_8681

You can use any paper you like, or wrap anything that fancies you, and write any fortune your imagination can get a hold of… and let these cherry branches be the life of the party!

To get your cherry branches to bloom, put them in very warm water when you bring them in.  Continue to add/change to warm water everyday and if you can put it beside a heater, or on top of a radiator, it will bloom faster.  It usually takes about one and a half to two weeks to bloom.

DSC_8701

DSC_8701

More home improvement projects here: Tropical water garden in your house

Use existing interior door with your sliding barn door hardware

Customer-Door-Black.jpg

There are many reasons to use an existing interior door with your new sliding barn door hardware:

  • You want it to match other doors in the house

  • You have one laying around and did not want it to go to waste

  • You might not be as adventurous to go with a full blown barn door style door

Whatever the reason might be, an interior door might be option best option. See for yourself below:

Customer-Door-Black.jpg

Customer Door Black

Image courtesy of Kevin from Etobicoke

Tropical water garden in your home

indoor_pond_3_Feb2013.jpg

I've always wanted to have a pond in my backyard with Koi and water plants but really never had the chance to fulfill it. Moreover, Canadian summers are too short and the pond becomes so desolate in the winter, which is never really a pretty sight. Luckily, our house, the base of 1925WorkBench, has a little mud room with beautiful sunlight, hot in the summer and not too cold in the winter, and I thought, why not use it as a green house? And when you're excited about something, you come up with this crazy idea - Why not make an indoor pond that can take natural sun light AND warm enough to hold water plants all year long?.

Well, this is what I mean:

indoor_pond_1

indoor_pond_1

This is what I did to build the pond:

  • Frame with 2x4

  • Line the interior wall with plywood

  • Spray foamed the exterior to give it better insulation since I anticipated the need to put a heater in the pond in the winter.

  • 7'x10' Tetra pond liner bought from Rona. Home Depot carries Laguna pond liner for 30% cheaper but it was made in China, as opposed to the Tetra, which was made in the USA. I opted to pay extra for the made in USA one for better quality.

  • 1x6 cedar for the pond wall.

I also built a little pocket to the left of the pond to house the filter and other equipment.

UPDATE:

indoor_pond_3_Feb2013.jpg

indoor_pond_3_Feb2013

indoor_pond_1_Feb2013

indoor_pond_1_Feb2013

indoor_pond_2_Feb2013

indoor_pond_2_Feb2013

This is what my indoor pond & tropical garden looks like as of February 2013.

You might have seen on the first picture that I have a little radiator heater there keeping the room temperature at 12 C.